Monday, October 8, 2018

How to Use Do Not Disturb While Driving

https://ift.tt/2xyx8re

Starting with iOS 11, Apple introduced a Do Not Disturb While Driving Feature that's designed to mute incoming calls, texts, and notifications while you're driving to cut down on accident-causing distractions.

Do Not Disturb While Driving is not a feature that's enabled automatically, but you will see a popup prompting you to turn it on when Apple detects the motion of a car after installing iOS 11 or later for the first time. Despite the notification, you'll still need to choose how you want to use the feature if you miss the initial setup process.
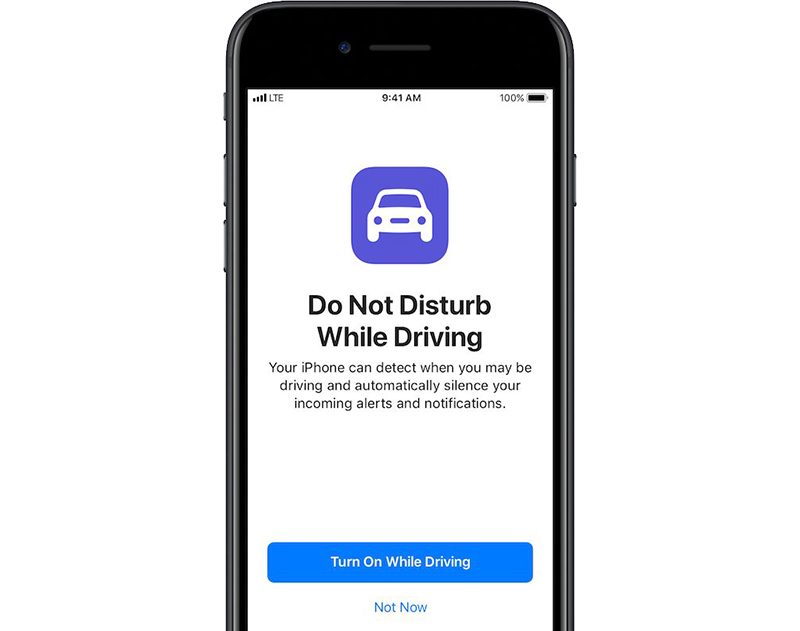

Do Not Disturb can be set to turn on manually, automatically when the iPhone detects a car's acceleration, or when an iPhone connects to a car's Bluetooth.

Enabling Do Not Disturb While Driving


  1. Open the Settings app.
  2. Tap Do Not Disturb.
  3. Scroll down to "Do Not Disturb While Driving."
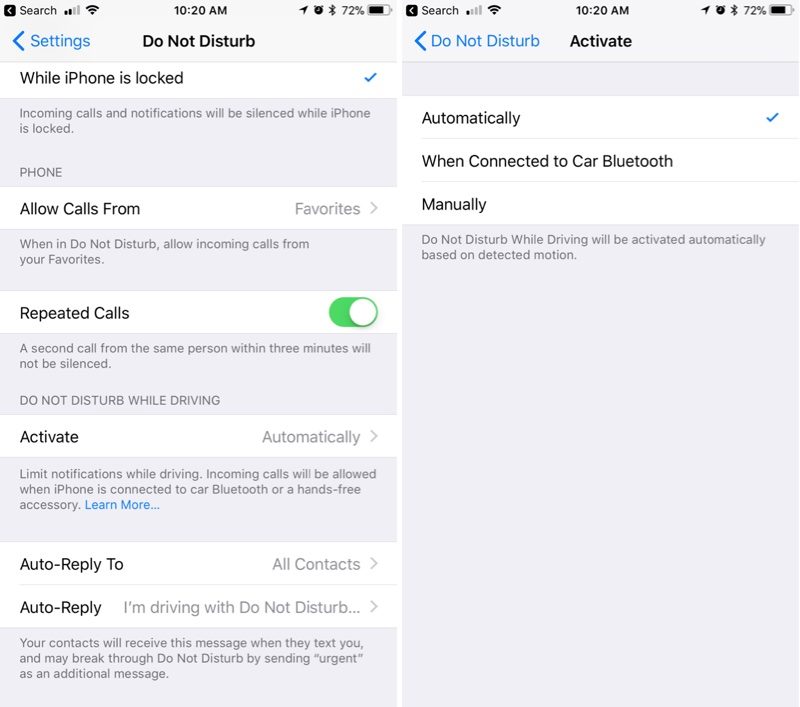
  4. Tap on "Activate" to choose how you want Do Not Disturb While Driving to be turned on. If you don't want to use Do Not Disturb While Driving, set it to manual.
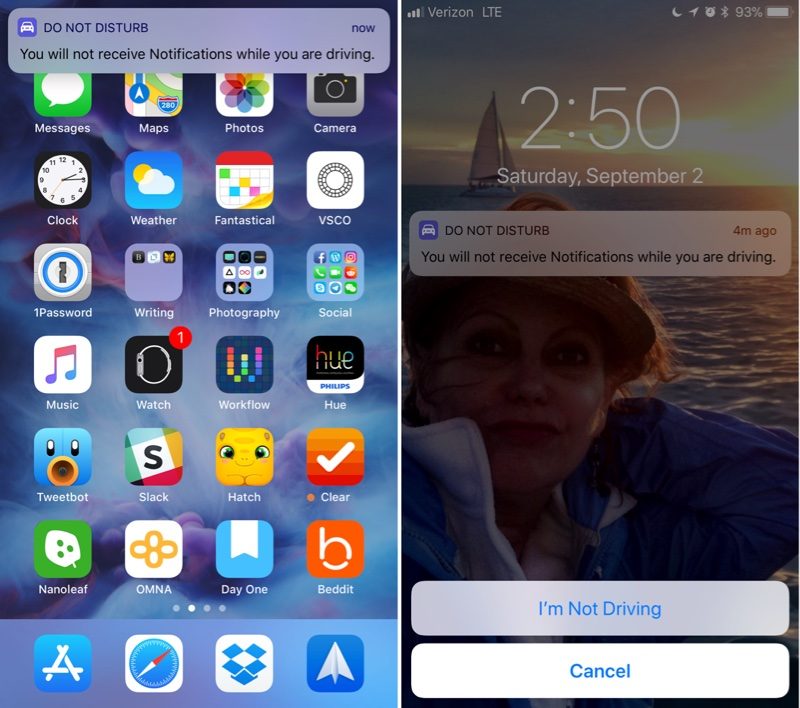
Whenever Do Not Disturb While Driving is activated, you'll see a bar at the top of the screen letting you know incoming notifications are being muted.

Do Not Disturb While Driving Control Center Toggle


If you don't want to have Do Not Disturb While Driving turn on automatically but still want to use it, there's a Control Center setting for activating it.

  1. Open the Settings app.
  2. Choose Control Center.
  3. Select Customize Controls.
  4. Add Do Not Disturb While Driving, which has an image of a car.
This adds the Do Not Disturb While Driving toggle to your Control Center. To turn it on or off, you just need to swipe to open the Control Center and tap it.

If You're a Passenger


When the automatic setting is enabled, Do Not Disturb While Driving will turn on whenever your iPhone detects the acceleration of a vehicle. This can be inconvenient if you're a passenger, so you'll need to turn it off through the Control Center or by tapping the persistent Do Not Disturb While Driving popup at the top of the display to let Apple know you're a passenger.

Choosing Your Auto Reply Options


When you're driving, all of your incoming text messages are muted. You can choose an automatic text message that lets people know you're in the car and will text later, and you can customize who sees the message.

  1. Open the Settings app.
  2. Choose Do Not Disturb.
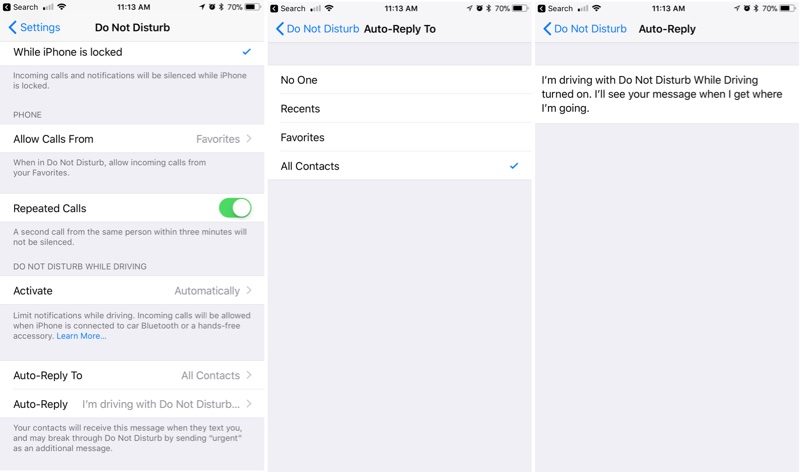
  3. Scroll down to "Auto-Reply To" and tap it.
  4. You can choose for automatic texts to be sent to Recents, Favorites, All Contacts, or No one, if you would rather not have your phone send automatic replies.

Customizing Your Auto Reply


  1. Open the Settings app.
  2. Choose Do Not Disturb.
  3. Scroll down to "Auto-Reply" and tap it.
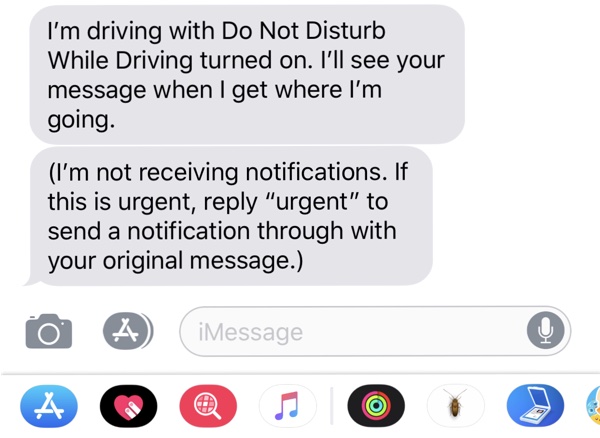
Apple sets a default message in this section, but you can change it to say whatever you want. This is the message people will receive when texting you when Do Not Disturb While Driving is enabled.

If there's an urgent issue and someone needs to get in contact with you immediately, they can break through Do Not Disturb While Driving by texting you "urgent." This will override your Do Not Disturb settings and will notify you of the text immediately.

An ideal setup is to set auto replies to your favorites, which likely translates to close friends and family. This will let them text you in an emergency situation, but will prevent other less urgent messages from being a distraction.

Phone Calls


If your iPhone is connected to your car's Bluetooth system, iOS is smart enough to know you have a hands-free calling method available. In this situation, calls will continue to come through even when Do Not Disturb While Driving is enabled. Texts and notifications from apps will continue to be muted, though.

If you're not connected to Bluetooth and have no hands-free accessory, calls will be blocked like text messages and notifications.

Parental Restrictions


For parents of teenagers, there's an option to enable a restriction that will prevent Do Not Disturb While Driving settings from being changed or toggled off, guaranteeing children are using the feature whenever they're in the car. Here's how to turn it on (iOS 12 or later):

  1. Open the Settings app.
  2. Choose Screen Time.
  3. Tap on Content & Privacy Restrictions.
  4. Tap on the Content & Privacy Restrictions toggle to turn on restrictions.
  5. Scroll down to Do Not Disturb While Driving and tap it.
  6. Choose Don't Allow.
On devices running an earlier version of iOS, there are different steps to follow to access device restrictions. Open the Settings app, choose General, scroll down to Restrictions and then tap it. Enter your passcode and then find the "Do Not Disturb While Driving" option and choose "Don't Allow Changes."


Discuss this article in our forums


from MacRumors: Mac News and Rumors - All Stories https://ift.tt/2xycsPT

HP Just Launched a Premium 14″ x360 Chromebook On the Eve Of Google’s Pixel Event


via Chrome Unboxed – The Latest Chrome OS News https://ift.tt/2pJlXa3

How to Share Your Wi-Fi Password With a Friend on iPhone or iPad

https://ift.tt/nvEILJ

In the iOS operating system, there's a handy feature that's designed to let you quickly share your Wi-Fi password with a friend, and, if you're at a friend's house, to get the Wi-Fi password with just a tap.

Subscribe to the MacRumors YouTube channel for more videos.

There are two prerequisites to use this feature: you must be running iOS 11 or later and you and your friend need to have each other listed as contacts in the Contacts app. Here's how it works:

  1. When a friend is at your house, have them open up the Settings app.
  2. Tap on Wi-Fi, and let the iPhone look for available networks.
  3. Have your friend tap on the name of your Wi-fi network.
From there, you'll get a popup on your own iPhone that asks you if you want to share your password. Tap "Share Password" and your Wi-Fi password is automatically sent to your friend's iPhone and they're able to join your Wi-Fi network.
Discuss this article in our forums


from MacRumors: Mac News and Rumors - All Stories https://ift.tt/2s8PEW7

How to Electronically Sign a PDF Using Preview on Mac

https://ift.tt/19V2wBi

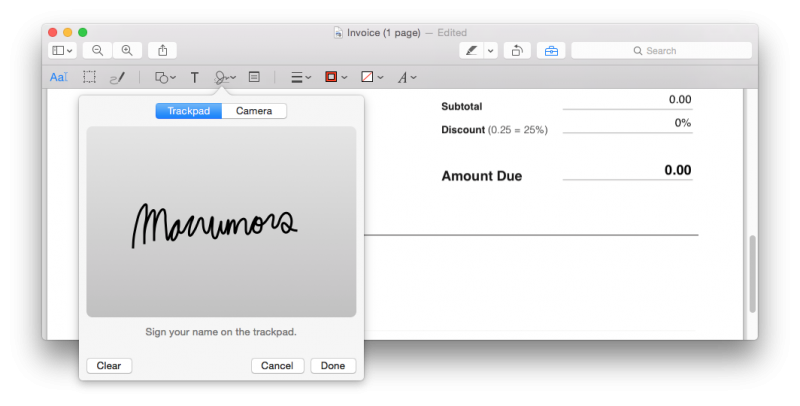
When you receive a PDF document by email that you must sign, the process of printing out the file, signing on the dotted line with a pen, scanning the signed document and sending it back can be a rather tedious task. Fortunately, Apple has added the ability to electronically sign a PDF document using Preview, a program that comes preinstalled on every Mac running OS X Lion or later.

MacRumors PDF Signature
The steps involved to electronically sign a PDF using Preview on Mac are quite simple and will save you valuable time, especially if you have multiple documents, contracts, forms or other paperwork to sign. If you are worried that your virtual signature will look bad, rest assured that you can create your signature by using the trackpad or holding up your signature on paper to a Mac's built-in iSight camera.

Steps to Electronically Sign a PDF Using Trackpad


  1. Open the PDF file you need to sign in Preview.
  2. Click on the Markup icon () and then the signature (Screen Shot 2015-03-26 at 1.28.51 PM) icon.
  3. Click on Create Signature > Click Here to Begin. Draw your signature on the trackpad. Click any key when finished. Click Done.
  4. Click on the signature created to insert it into the PDF document. The signature can be moved or resized like a regular image.

Steps to Electronically Sign a PDF Using Camera


  1. Open the PDF file you need to sign in Preview.
  2. Click on the Markup icon () and then the signature (Screen Shot 2015-03-26 at 1.28.51 PM) icon.
  3. Click on Create Signature > Camera. Sign your name on white paper and hold it to be visible to the camera. Preview will draw a virtual signature. Click Done.
  4. Click on the signature created to insert it into the PDF document. The signature can be moved or resized like a regular image.

Tips


  • If you are using the trackpad to create your electronic signature, it is recommended that you look at Preview and go slow and steady with your finger to achieve the best result. For an even more precise signature, you can use an iPhone or iPad stylus, preferably one with a fine-tipped ending, to draw your signature on the trackpad.


  • Signing a piece of white paper and holding it up to the camera is the easiest way of creating an electronic signature in Preview, although this method does not always yield the best results. The signature will appear inverted when you hold it up to your Mac's camera, but Preview will automatically ensure that it reads properly from left to right.


  • You can create an electronic signature in Preview by following steps above even if you do not have a PDF document opened. By default, all electronic signatures that you create are automatically stored in a list on Preview so that you can insert them into future PDFs documents and other files without needing to repeat these steps. Preview can store multiple signatures at once.


  • Apple also provides markup tools in the Mail app in macOS to create electronic signatures that can be directly inserted into your emails.


Discuss this article in our forums


from MacRumors: Mac News and Rumors - All Stories https://ift.tt/2rL9PFJ

First look video: Project Stream beta of Assassin’s Creed Odyssey on the Pixelbook


via About Chromebooks https://ift.tt/2OKpxyt

You can now unlock your Windows PC with your Android’s fingerprint sensor, Here’s how you can do it


via News – MySmartPrice https://ift.tt/2y8ocYP

Microsoft brings Xbox experience to mobile devices with Project xCloud


via News – MySmartPrice https://ift.tt/2ILH6cb